When you travel, you may sometimes want to be able to access some resources that are present on your flat’s network, make your traffic go through a VPN or what not because you don’t trust the network you are in (wether it is a hotel/coffee shop or what not). This blogpost is going to explain how you can build a nice travel router for when you travel around, so no one steals your nudes or snoops on the sketchy p0rn you watch.
What we are going to achieve
I’ll show you how you can build a small armbian-based router that enables you you:
- Connect to some WAN
- Have a local LAN with a custom DHCP range
- Have a second LAN (potentially accessible over WiFi) that routes all your traffic through a wireguard VPN tunnel
- Have a local DNS over TLS resolver so you avoid leaking DNS queries
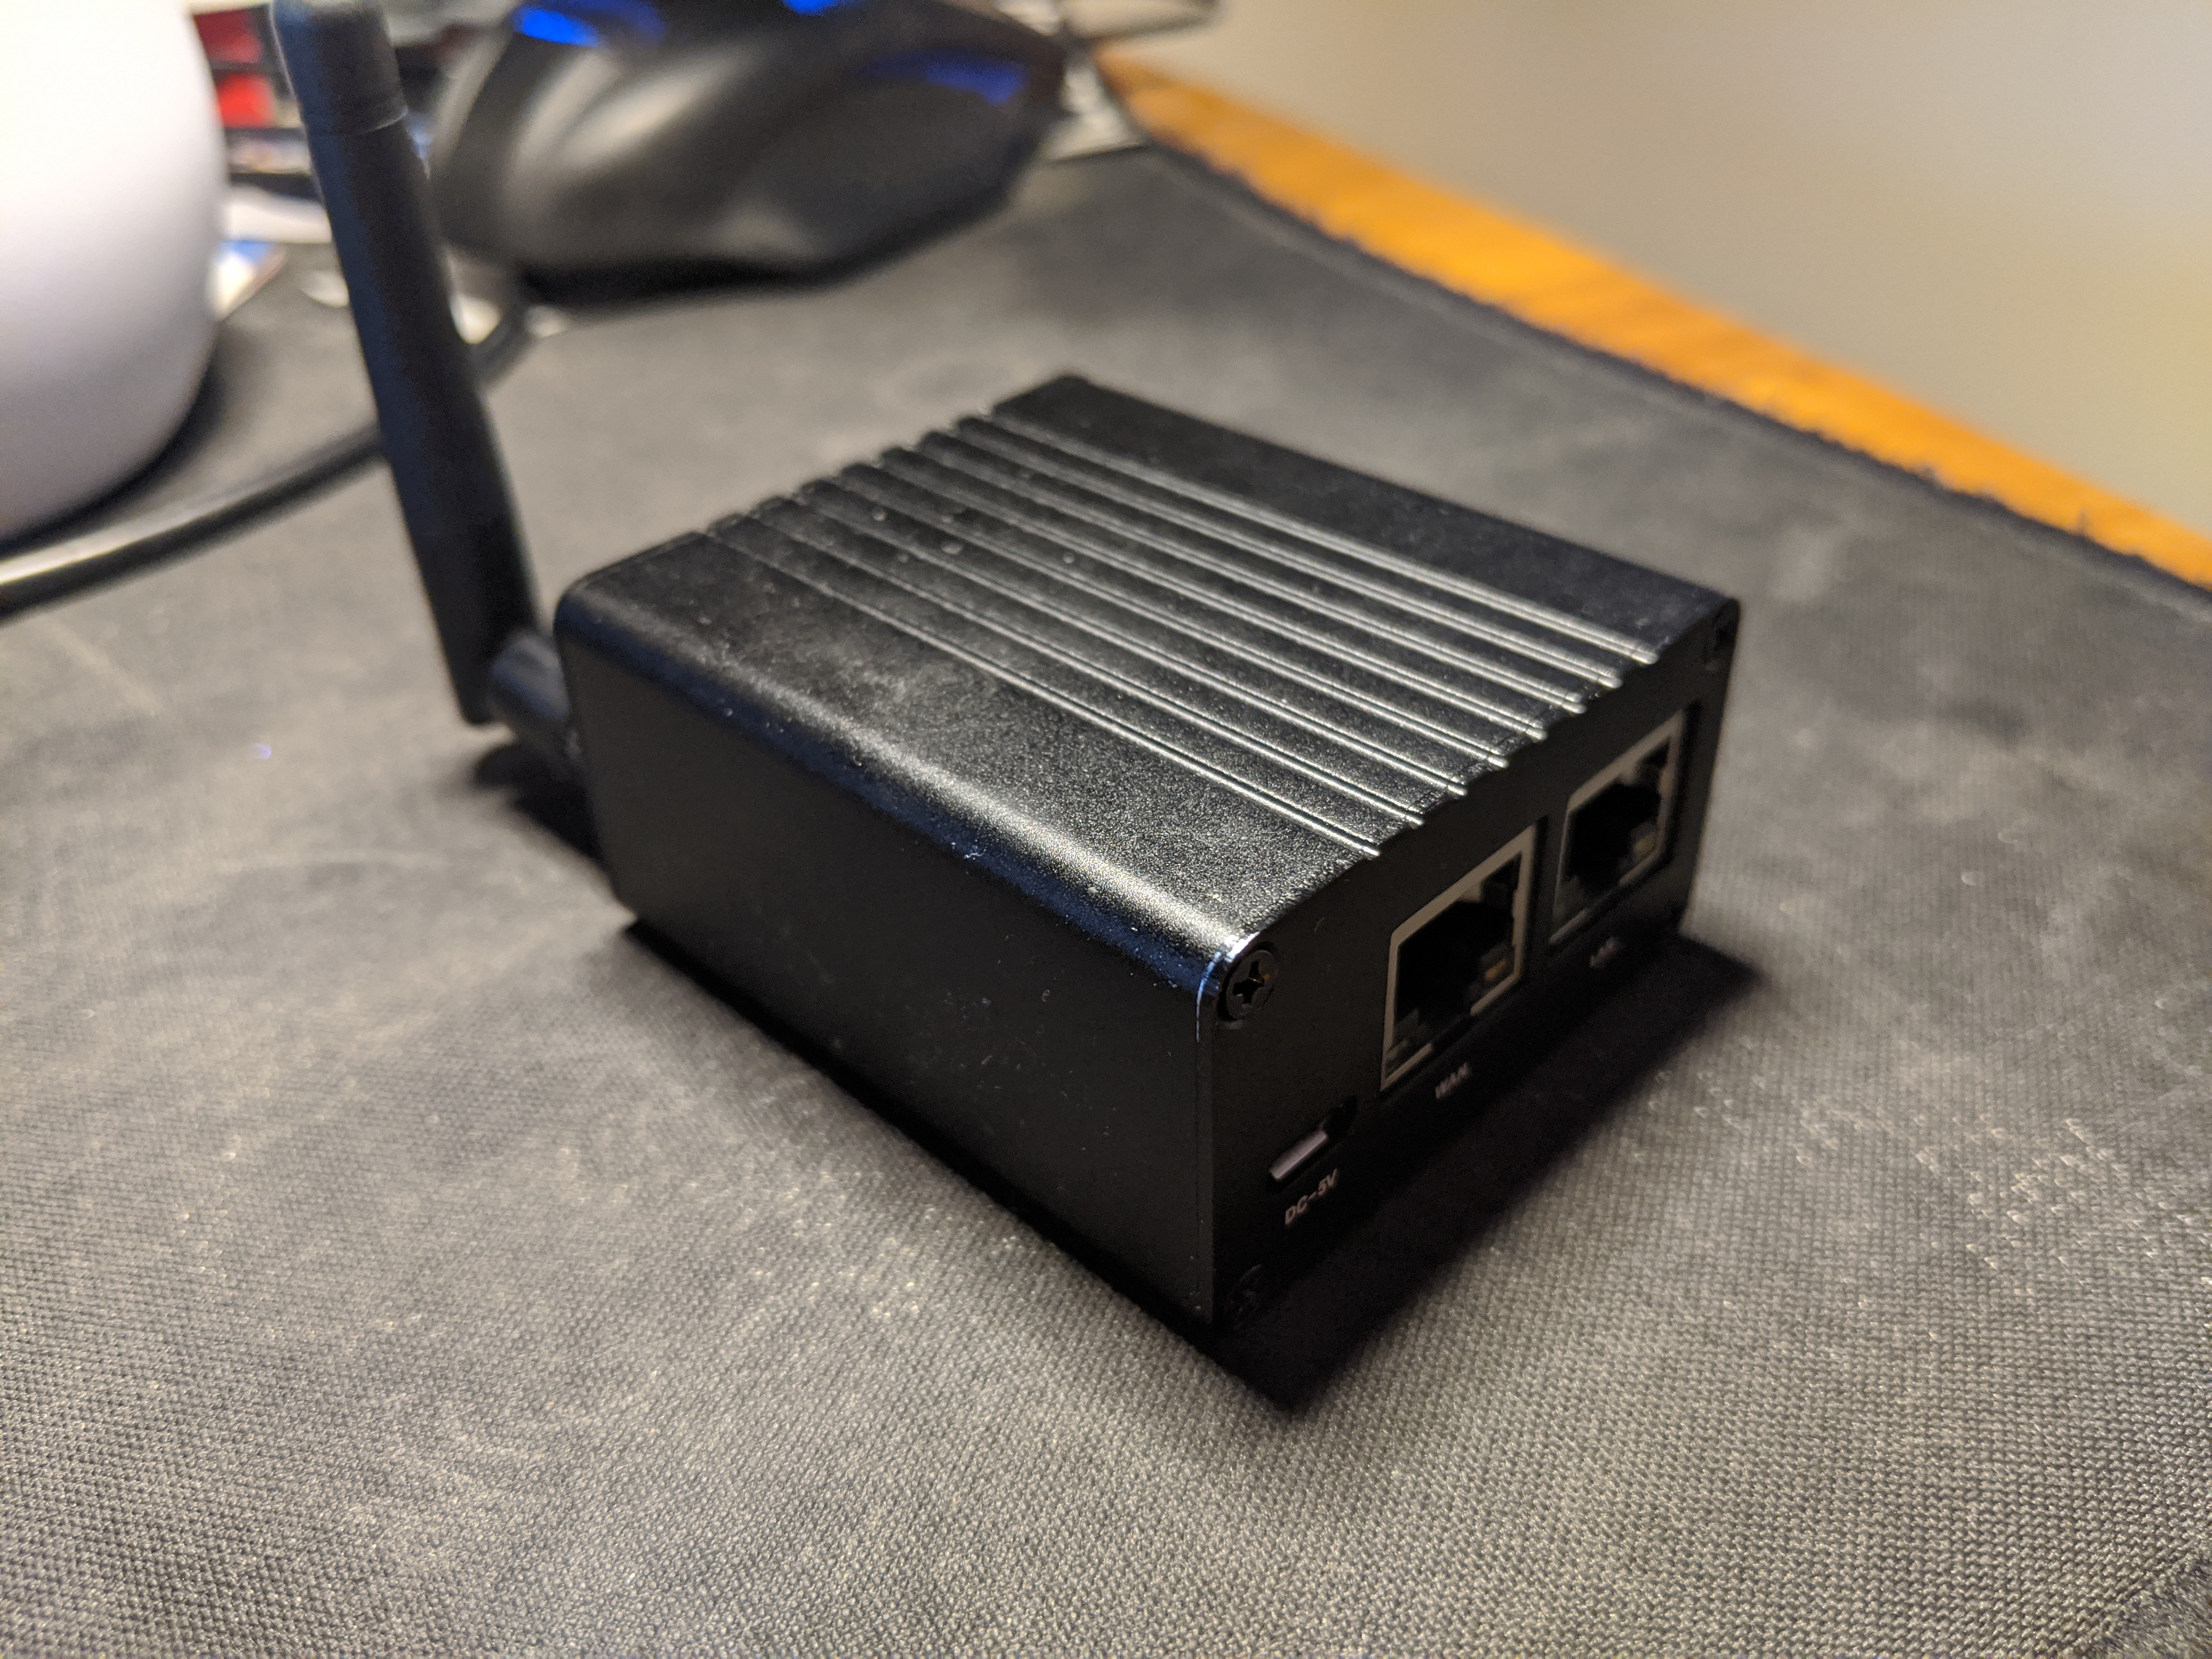
Bill of materials
For this project, I purchased a £60 Nano Pi R1 off Amazon. You can find a cheaper one (10 quids less) if you are ready to drop from 1G to 512M of RAM, and even cheaper if you drop the metal casing. But I took the beefier version and the metal casing because having a nice packaging is always nice.
I then used an extra WiFi dongle I used on my old Raspberry Pies, which is probably worth 10ish quids.
Slap an OS on it !
Initially I wanted to setup the router using OpenWRT, but as usual I didn’t check the hardware’s compatibility before buying it and OpenWRT is not supported yet, sucks to be me but oh well, I’ll use an other operating system there, Armbian. This is basically a Debian fork targetted at embedded systems, that embeds a recent kernel and a bunch of cool things such as built in Wireguard support.
Get the OS there (you can either use Debian Buster or Ubuntu Bionic at the time of writing, I went with Buster, but Bionic should be pretty similar), burn it on an SD card and insert it on the device.
Log into the box
Just SSH on the box using ssh root@<ip> using the password 1234. You will be prompted to setup a new password, then do whatever you want to feel comfortable on the box, like installing tmux, vim, zsh if you are into that.
Initial settings
Predictible interface names
I’m not sure about you, but I really hate systemd style interface names and I want my eth* and wlan* names: To do that add the following line to the /boot/armbianEnv.txt file:
extraargs=net.ifnames=0
Disable IPv6
I have no need for IPv6, I’ll just disable it, add to /etc/sysctl.conf:
net.ipv6.conf.all.disable_ipv6=1
net.ipv6.conf.default.disable_ipv6=1
Install a few packets
|
|
Reboot
|
|
Setting up the network interfaces
So if you look at what you have right now, you should see the following
|
|
Remember the following:
eth0is the WAN interface, the one you connect to the upstream networketh1is the LAN interface, the one you can connect to with your laptop for instancewlan0is the internal wifi interface, we will use it as a VPN only access pointwlan1is the USB wifi dongle, we will use it to create a local network without VPN
Setting up the wireguard tunnel
I won’t expand on how to setup a wireguard tunnel here, I refet you to this excellent article by brouberol
At the end of it you should end up with a wg0 interface. You can create as many as you want, if you want to add a wg1 interface that would allow you to connect to your home network for instance.
Here for reference is my own /etc/wireguard/wg0.conf
[Interface]
PrivateKey = [REDACTED]
ListenPort = 5555
SaveConfig = false
Address = 192.168.11.10/32
Table = 42

[Peer]
PublicKey = [REDACTED]
AllowedIPs = 0.0.0.0/0
Endpoint = [REDACTED]:5555
Note that the Table = 42 parameter is super important since otherwise Wireguard is going to interfere with your other routing tables and rules, which you do not want. The 42 number is arbitrary you can pick whatever you want as long as it matches the routing table number you assign to the vpn routing table that you will create in the next section.
Start the interface now
|
|
Create a custom routing table
We need a custom routing table for the VPN only network, this will allow us to make sure that the traffic on this network is routed accordingly to this table, to avoid it going out unencrypted through eth0 and leaking to potential curious eyes. Alter the /etc/iproute2/rt_tables file as follows:
|
|
The 42 vpn means that we create a routing table with id 42 and assign it the name vpn. The ID can be anything between 1 and 252, and the name can be anything.
Setting up the bridges
We are going to create the following bridges:
vpn0, which we will use to route the VPN trafficlan0, which we will use to route the local LAN traffic
|
|
Here we setup lan0 as the master for eth1, and assign the range 10.69.0.1/24. Next up the vpn0 interface:
|
|
There is a bunch of stuff to unpack here. We create the vpn0 interface as a bridge (with the pre-up command). Then we assign the 10.69.1.1/24 range to the interface.
Then we have a bunch of post-up and down commands, which are invoked respectively when the interface is brought up and down.
pre-up ip link add $IFACE type bridgecreates the interfacepost-up /sbin/ip route add default dev wg0 table vpnsets thewg0interface as the default interface for thevpnrouting table we created abovepost-up /sbin/ip rule add iif vpn0 lookup vpn priority 1000inserts the routing table in the routing evaluation list with a high priority (higher than the standard one) for all the packets that come from thevpn0interface.post-up /sbin/ip rule add iif vpn0 blackhole priority 1001same as above, except we nullroute the packets. This makes sure that if the packet do not match any routes from the routing table it gets dropped instead of leaked.
You may now bring the interfaces up
|
|
Setup the wifi accesspoints
Install hostapd if it is not already present
|
|
And now create the two networks, the LAN:
|
|
And the VPN
|
|
Note the bridge= configuration directives that instruct hostapd to setup the interfaces with vpn0 and lan0 as masters.
Then edit the default hostapd arguments to make sure these 2 config files are loaded:
|
|
Then restart the service
|
|
You should now see your 2 SSID announced.
Setup DHCP
We use dnsmasq for DHCP, it should be installed by default. Setup the following configuration file and restart the service:
|
|
This sets up the IP ranges for the two interfaces and forces them to use the router as the resolver.
Setup DNS
Setup unbound
We will now setup unbound as a DNS resolver, update the config and restart the service
|
|
This sets up unbound to forward the DNS queries to cloudflare and quad9 DNS servers, using TLS so you would not leak the queries.
Nuke systemd-resolved
It has the annoying habbit to change /etc/resolve.conf, just edit the file to make it look like
|
|
Then
|
|
This will ensure that no one can modify the file.
Setup iptables
You now need to setup the iptables rules to allow everything to work, edit the /etc/iptables.ipv4.nat file (this will only work on armbian):
|
|
Finish it !
Now reboot, and you should have a functional travel router that allows you to secure your communication with a VPN wireless network !