Introduction
If you are anything like me you probably like to tinker a bit with your home network. I discovered OpenWRT a few years ago and ever since my Turris Omnia router almost never failed me. I since acquired a bunch of small ARM boards capable of running my network that rely on OpwnWRT. The thing is, I am the furthest away I would be from a legit network engineer, and it has happened a few times that I would completely fuck over my network because I did something wrong without actually realising it. It is pretty bad and I needed a way to test topologies and changes before actually applying them to my real network.
For a while small ARM boards like my BananaPi R1 (than I now use on my homelab network, so unuseable for testing), various NanoPi R1 or R2S helped well, but I cannot be bothered to go through the hassle of repeatedly flash new SD cards each time I want a fresh install, because I am a lazy fuck.
I tried to virtualise OpenWRT using VirtualBox but for reasons that I still do not understand today, it would not fulfil my needs, and would just plain not work. A buddy of mine pointed me to Virt-manager, a solution based on QEMU/KVM and libvirt that worked well for me.
What are we going to do ?
I will explain how to virtualise a working 2+ ports router in OpenWRT, so you can test and apply configurations, as well as use it as the gateway for your other virtual machines, containers and basically anything you want. Note that this setup works in a KVM deployment, so you could probably set that up as well in your proxmox deployment.
The benefits of this is you would get a setup that would sort of be ISO to your real word setup, you could tinker with DHCP options, TFTP boots for your other machines, test various VPN setups and DNS filterings and so much more! So how about we get started ?
Setting up
OpenWRT image and packages
You need a few things to get started, first grab an image of openwrt x86, at the time of writing the latest available is 21.2.0, you can grab it like so
|
|
You also need a few system packages such as virt-manager and bridge-utils
|
|
The handy dandy network setup script
We need another thing to set up the network and to be able to connect the router to the world: bridges. The setup is going to be as follows: we are going to create a router with 4 ports as an example, so we would need 4 bridges. One will be the libvirt’s virbr0 bridge that will act as our WAN port, and three other ones that will be plugged to our switch, they will be named sw-r0-eth[1-3]. Lastly we need to make it so our laptop gets connected to the LAN of the router, so for that we will use a veth pair, one of the ends will be enslaved to the sw-r0-eth1 bridge.
That looks tedious so I made a script for that, you can download it here.
You can adapt it to your needs, the relevant config options are at the begining of the script:
|
|
The comments should be pretty self explanatory. It will create 4 bridges (we will only use 3 of them) and a veth pair veth0:veth1 with veth1 being enslaved to sw-r0-eth1 and veth0 being assigned an address using dhcp (more on this later).
You can run the following commands:
|
|
You can go ahead and run the start command to setup the bridge
|
|
Amazing ! We can now go ahead and set up the virtual machine !
The virtual machine
So go ahead and fire up Virt-manager and follow the following steps:
- Hit the
Create new VMbutton - Select the
Import existing disk imageoption and hitForward - Select the path of the openwrt image you downloaded
- Select
Generic defaultas the OS type, it should work, then hitForward - Adjust the memory and CPU settings, the defaults are fine but openwrt really does not need more than 256M of RAM, hit
Forward - Name the VM and tick
Customize before install, then hitFinish
Now we are going to configure the network interfaces. For the existing one, click on it and assign it to Virtual network 'default': NAT, this is going to be our WAN port.
⚠️ OpenWRT will consider the WAN port to be eth1 for some reason and we will have to flip them over later on, if you cannot be bothered with this then set up the second ethernet interface as the NAT one, and flip the settings in the script above to make veth1 a slave of sw-r0-eth0. Fundamentally it does not change anyhting but I like my WAN port to be eth0 so this is what we are going to do.
Next add 3 more interfaces in order and assign them to the sw-r0-ethX ports respectively, you should not have to change any more settings.
⚠️ The interface order matters in virt-manager, so double check that. Check as well that you are configured to NAT traffic from openwrt to the internet on the virbr0 bridge, or alternatively run start-net.sh iptables to make sure it gets set up.
When this is done, hit apply and start the VM.
Configuring the VM’s interfaces
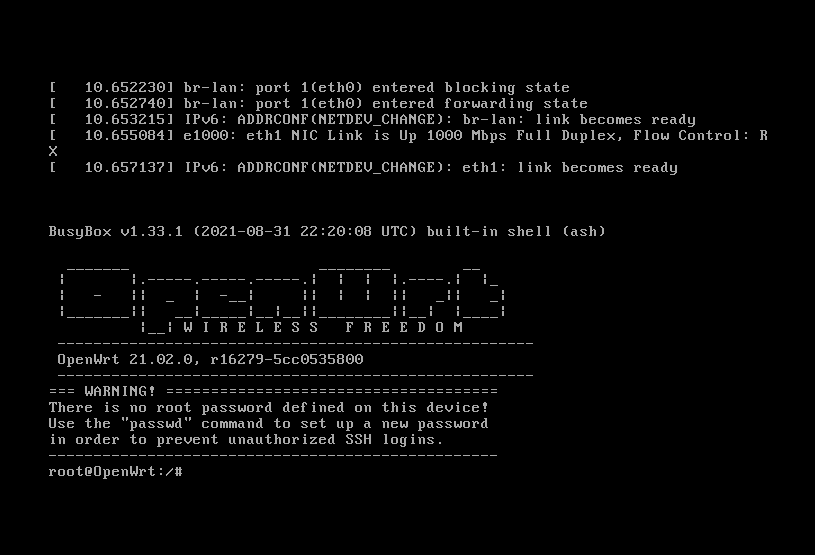
Once you fired up the VM, wait a few seconds then get on the KVM window, and you should see something like that:
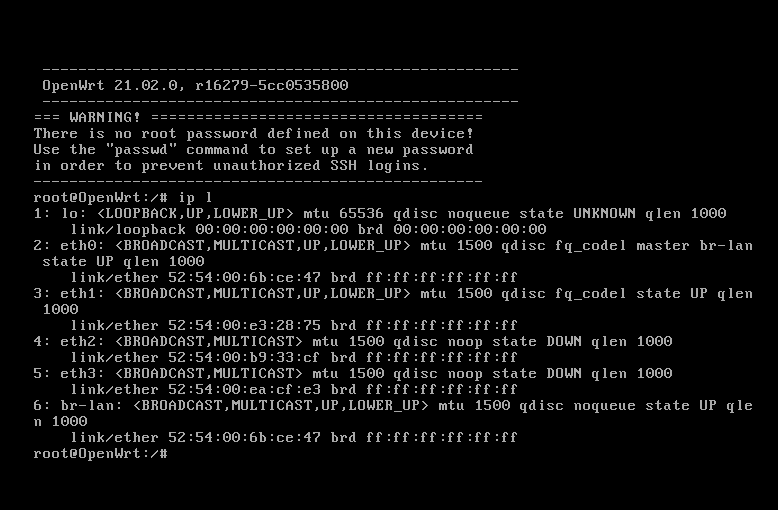
You can check as well that we have 4 eth interfaces like so
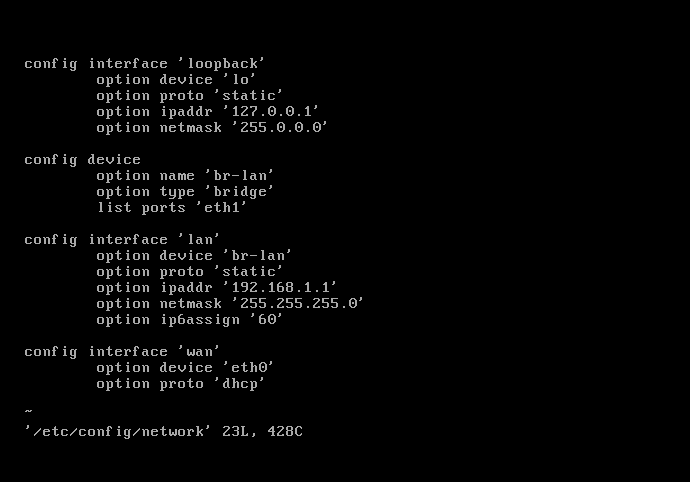
Now before we can connect to SSH to the virtual machine, we should flip eth0 and eth1 as the wan port. For this, you should look into the /etc/config/network file that will look like this

You need the following changes:
- In the
device/br-lansection, change the port toeth1 - In the
interface/wanandwan6section change thedeviceoption toeth0 - I just remove altogether the wan6 section because i dont use it.
- Optionally you can also change the LAN CIDR if it clashes with anything in your network
It should look like this
When you are done with it restart the network using /etc/init.d/network restart and validate it works
Now we are ready to connect to the router from our PC!
Getting a DHCP address
Use the setup-net.sh script for that, you can also do it manually with dhclient but take care to remove th default route dhclient will force on you, or you will loose internet access.
|
|
And we are connected using the veth!
Checking everything works
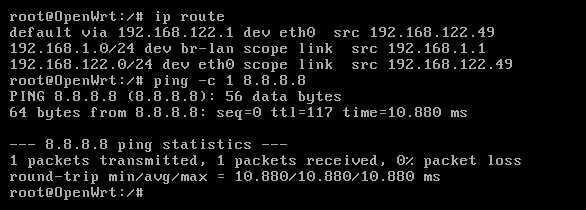
Let’s check we can talk to the router now:
|
|
How about SSH ?
|
|
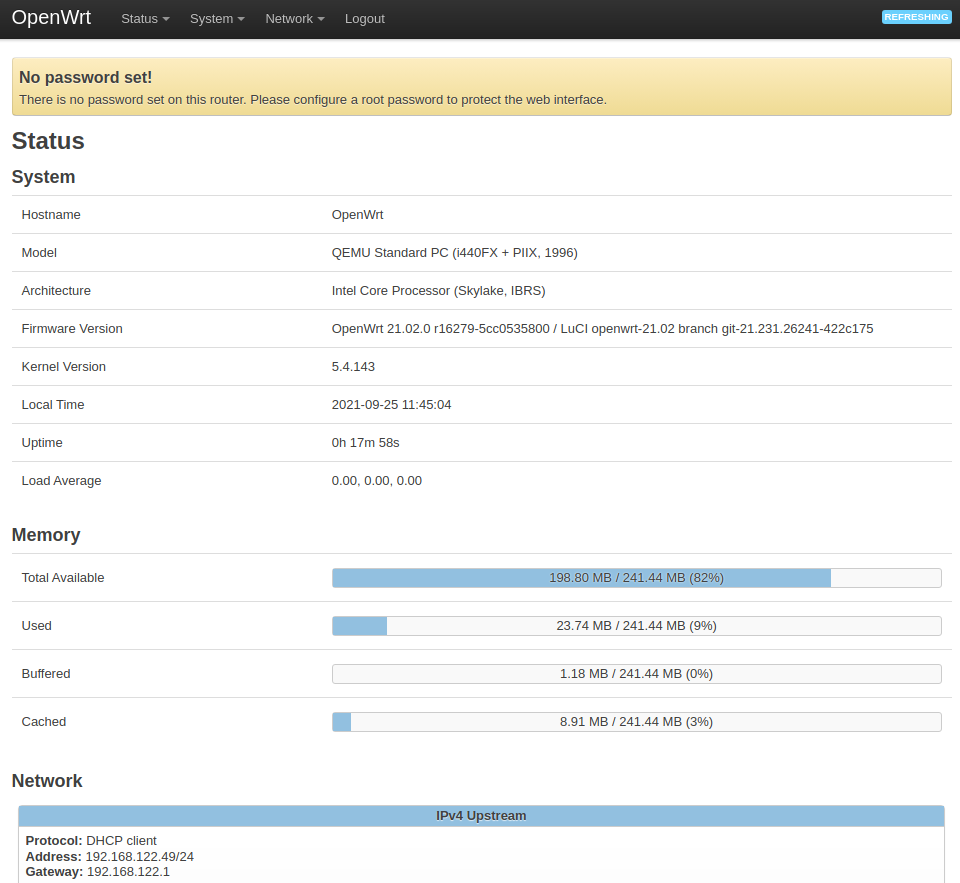
All good ! We can even access the LUCI interface of OpenWRT (root password is empty by default)
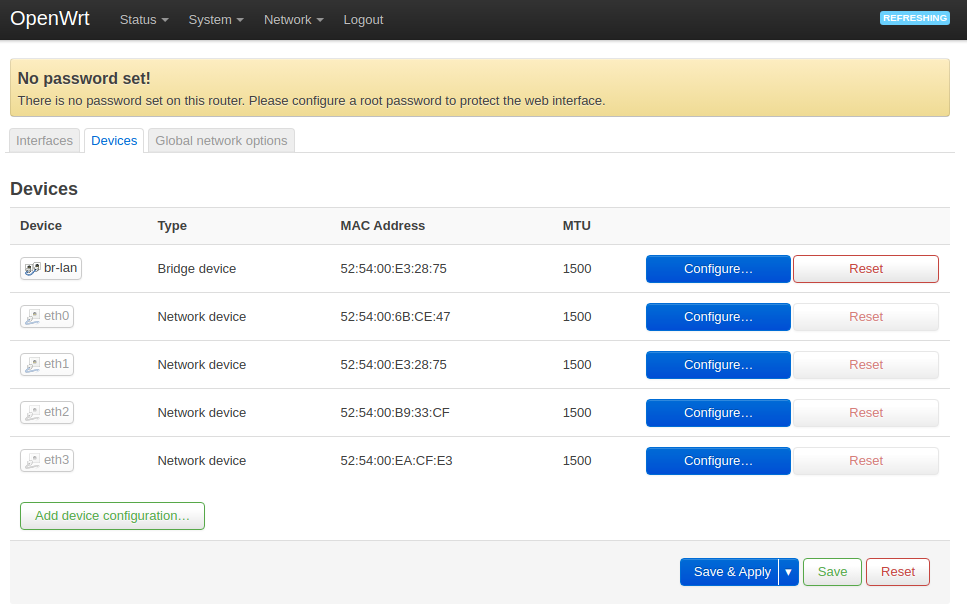
You can now add devices and VLANs that would utilise the two ther interfaces as you would normally on a physical openwrt install, and from then the sky is the limit.
Wrapping up
You now possess a 4 ports virtual router you can use to test your OpenWRT setups, ramp up on network administration, use it in your virtual lab as the router, and so much more. I have not tried it in some sort of Proxmox deployments or what not but it should really work the same. You can try to create another VM (ubuntu or what have you) and set its primary NIC as a slave of the sw-r0-eth1 bridge, and its traffic will flow through your router!